
| 일 | 월 | 화 | 수 | 목 | 금 | 토 |
|---|---|---|---|---|---|---|
| 1 | 2 | 3 | 4 | 5 | 6 | 7 |
| 8 | 9 | 10 | 11 | 12 | 13 | 14 |
| 15 | 16 | 17 | 18 | 19 | 20 | 21 |
| 22 | 23 | 24 | 25 | 26 | 27 | 28 |
| 29 | 30 | 31 |
- aws
- Docker
- vue
- SpringBoot
- ec2
- EMR
- 젠킨스
- spring
- Zeppelin
- 예제
- 레디스
- 설정
- 자바
- Cluster
- Mac
- java
- 머신러닝
- 간단
- login
- fastcampus
- redash
- config
- 로그인
- 자동
- 클러스터
- Kafka
- hive
- gradle
- Jenkins
- Redis
- Today
- Total
코알못
5분 안에 구축하는 Swagger (API 규격서) 본문

우선 Swagger 가 무엇인가 ? 구글에게 물어 보았다.
쉽게 말해 REST API 규격서를 쉽게 만들어 주는 프레임워크 이다.
API 만들면 사용자들에게 규격서를 만들어 공유 해야 하는데 문서 작업만큼 귀찮고 힘든 일이 없다. 그리고 은근 시간이 많이 드는 작업이다. 우리는 규격서를 자동으로 만들어 주는 친구를 배워 규격서 생성에 대한 공수를 줄여본다!
자 그럼 만들어 보면서 어떤 친구인지 알아보자!
우선 API 를 Method 별로 몇개 만들어 보자
// Response
package com.code.vo;

import lombok.Data;

@Data
public class Response {
    String version;
    String method;
}
// mainController
package com.code.controller;

import com.code.vo.Response;
import org.springframework.web.bind.annotation.PathVariable;
import org.springframework.web.bind.annotation.RequestMapping;
import org.springframework.web.bind.annotation.RequestMethod;
import org.springframework.web.bind.annotation.RestController;
import javax.servlet.http.HttpServletRequest;

@RequestMapping("/main")
@RestController
public class MainController {

    @RequestMapping(value = "/{version}/data", method = RequestMethod.GET)
    public Response mainGet(HttpServletRequest request, @PathVariable("version") String version){
        return new Response(){{
            setVersion(version);
            setMethod(request.getMethod());
        }};
    }
    @RequestMapping(value = "/{version}/data", method = RequestMethod.POST)
    public Response mainPost(HttpServletRequest request, @PathVariable("version") String version){
        return new Response(){{
            setVersion(version);
            setMethod(request.getMethod());
        }};
    }

    @RequestMapping(value = "/{version}/data", method = RequestMethod.DELETE)
    public Response mainDelete(HttpServletRequest request, @PathVariable("version") String version){
        return new Response(){{
            setVersion(version);
            setMethod(request.getMethod());
        }};
    }

    @RequestMapping(value = "/{version}/data", method = RequestMethod.PUT)
    public Response mainPut(HttpServletRequest request, @PathVariable("version") String version){
        return new Response(){{
            setVersion(version);
            setMethod(request.getMethod());
        }};
    }
}
// subController
package com.code.controller;

import com.code.vo.Response;
import org.springframework.web.bind.annotation.PathVariable;
import org.springframework.web.bind.annotation.RequestMapping;
import org.springframework.web.bind.annotation.RequestMethod;
import org.springframework.web.bind.annotation.RestController;
import javax.servlet.http.HttpServletRequest;

@RequestMapping("/sub")
@RestController
public class SubContoller {

    @RequestMapping(value = "/{version}/data", method = RequestMethod.GET)
    public Response subget(HttpServletRequest request, @PathVariable("version") String version){
        return new Response(){{
            setVersion(version);
            setMethod(request.getMethod());
        }};
    }

    @RequestMapping(value = "/{version}/data", method = RequestMethod.POST)
    public Response subPost(HttpServletRequest request, @PathVariable("version") String version){
        return new Response(){{
            setVersion(version);
            setMethod(request.getMethod());
        }};
    }

    @RequestMapping(value = "/{version}/data", method = RequestMethod.DELETE)
    public Response subDelete(HttpServletRequest request, @PathVariable("version") String version){
        return new Response(){{
            setVersion(version);
            setMethod(request.getMethod());
        }};
    }

    @RequestMapping(value = "/{version}/data", method = RequestMethod.PUT)
    public Response subPut(HttpServletRequest request, @PathVariable("version") String version){
        return new Response(){{
            setVersion(version);
            setMethod(request.getMethod());
        }};
    }
}
이제 스웨거를 입혀보자
아래 메이븐 레파지토리 저장소에서 원하는 버전을 고르고(저자는 22.02.05 기준 최신버전을 가져왔다.) gradle 에 의존성을 추가한다.
:: https://mvnrepository.com/artifact/io.springfox/springfox-swagger2
// build.gradle
implementation 'io.springfox:springfox-swagger2:3.0.0'// swagger
@Configuration
public class Swagger {
    @Bean
    public Docket api() {
        return new Docket(DocumentationType.SWAGGER_2)
                .select()
                .apis(RequestHandlerSelectors.any()) // 모든 API를 불러온
                .paths(PathSelectors.any()) // 모든 path 에 대해 규격서를 만든다.
                .build();
    }
}
이제 설정은 완료되었다. 시작해보면 규격서가 자동으로 나오는 것을 볼 수있다.
http://localhost:8080/swagger-ui/index.html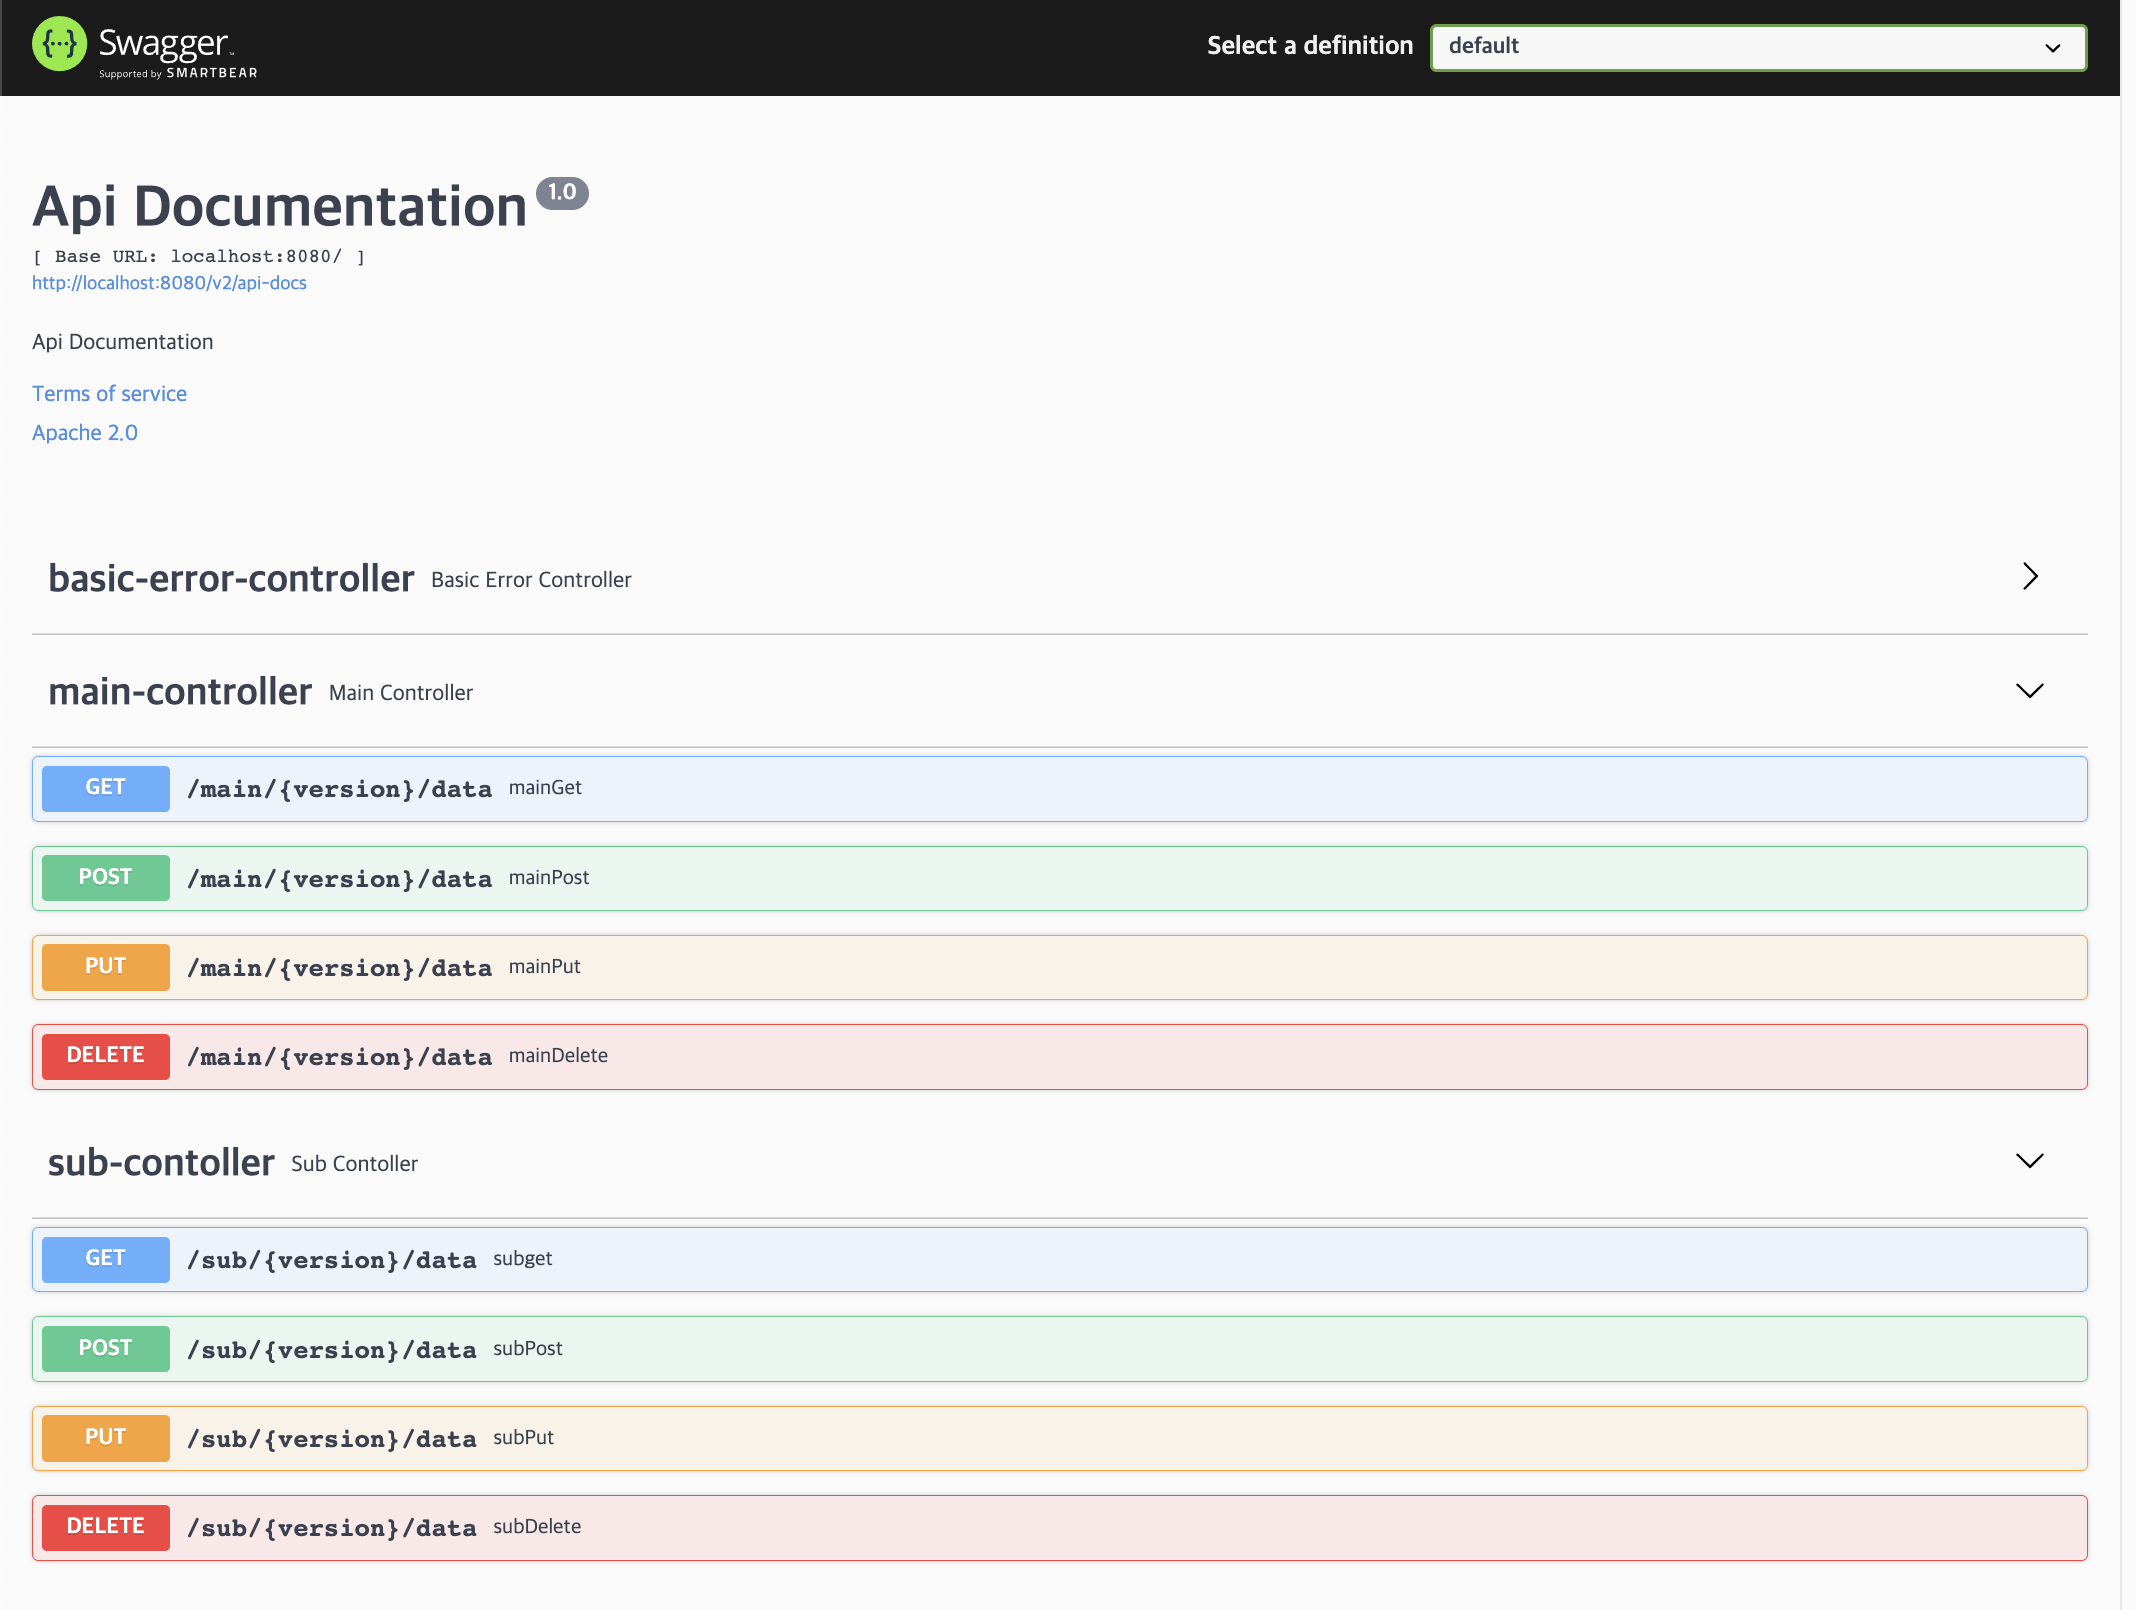
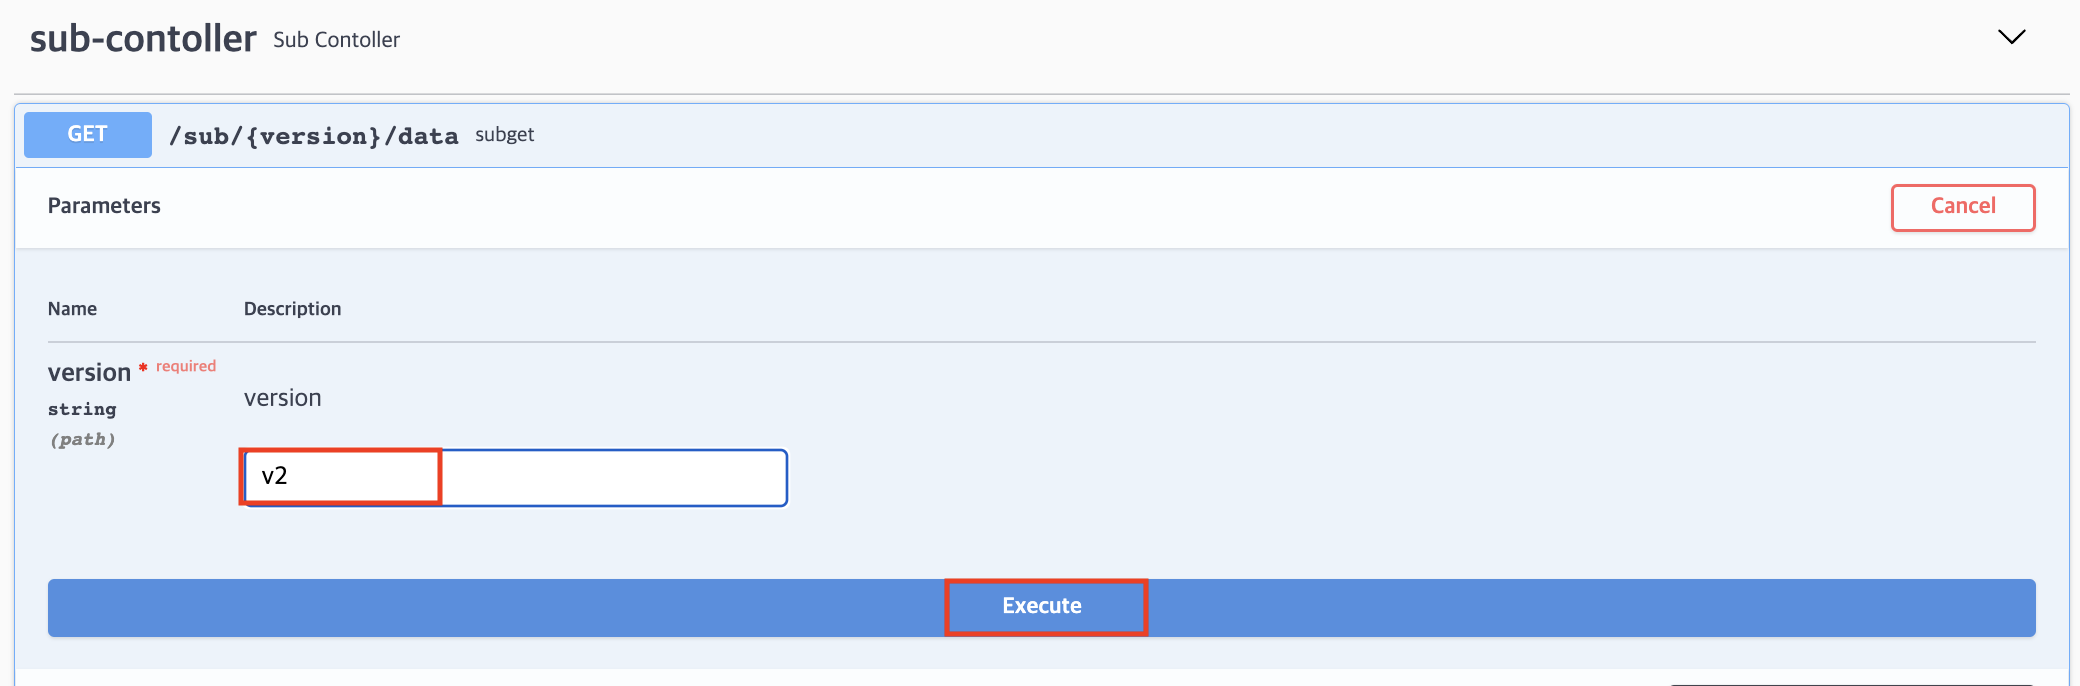
URL을 클릭 해보면 아래와 같이 상세 request, response 에 대한 규격을 확인할 수 있으며

try it out 버튼을 클릭하여 실제로 서버에 호출하여 테스트할 수 있다.

만약 특정 Path 에 해당하는 API 만 규격서로 제공 하고 싶다면 아래와 같이 설정 하면 가능하다.
@EnableSwagger2
@Configuration
public class Swagger {
@Bean
public Docket api() {
return new Docket(DocumentationType.SWAGGER_2)
.select()
.apis(RequestHandlerSelectors.any()) // 모든 API를 불러온
.paths(PathSelectors.ant("/sub/**")) // sub로 시작하는 path 에 대해 규격서를 만든다.
.build();
}
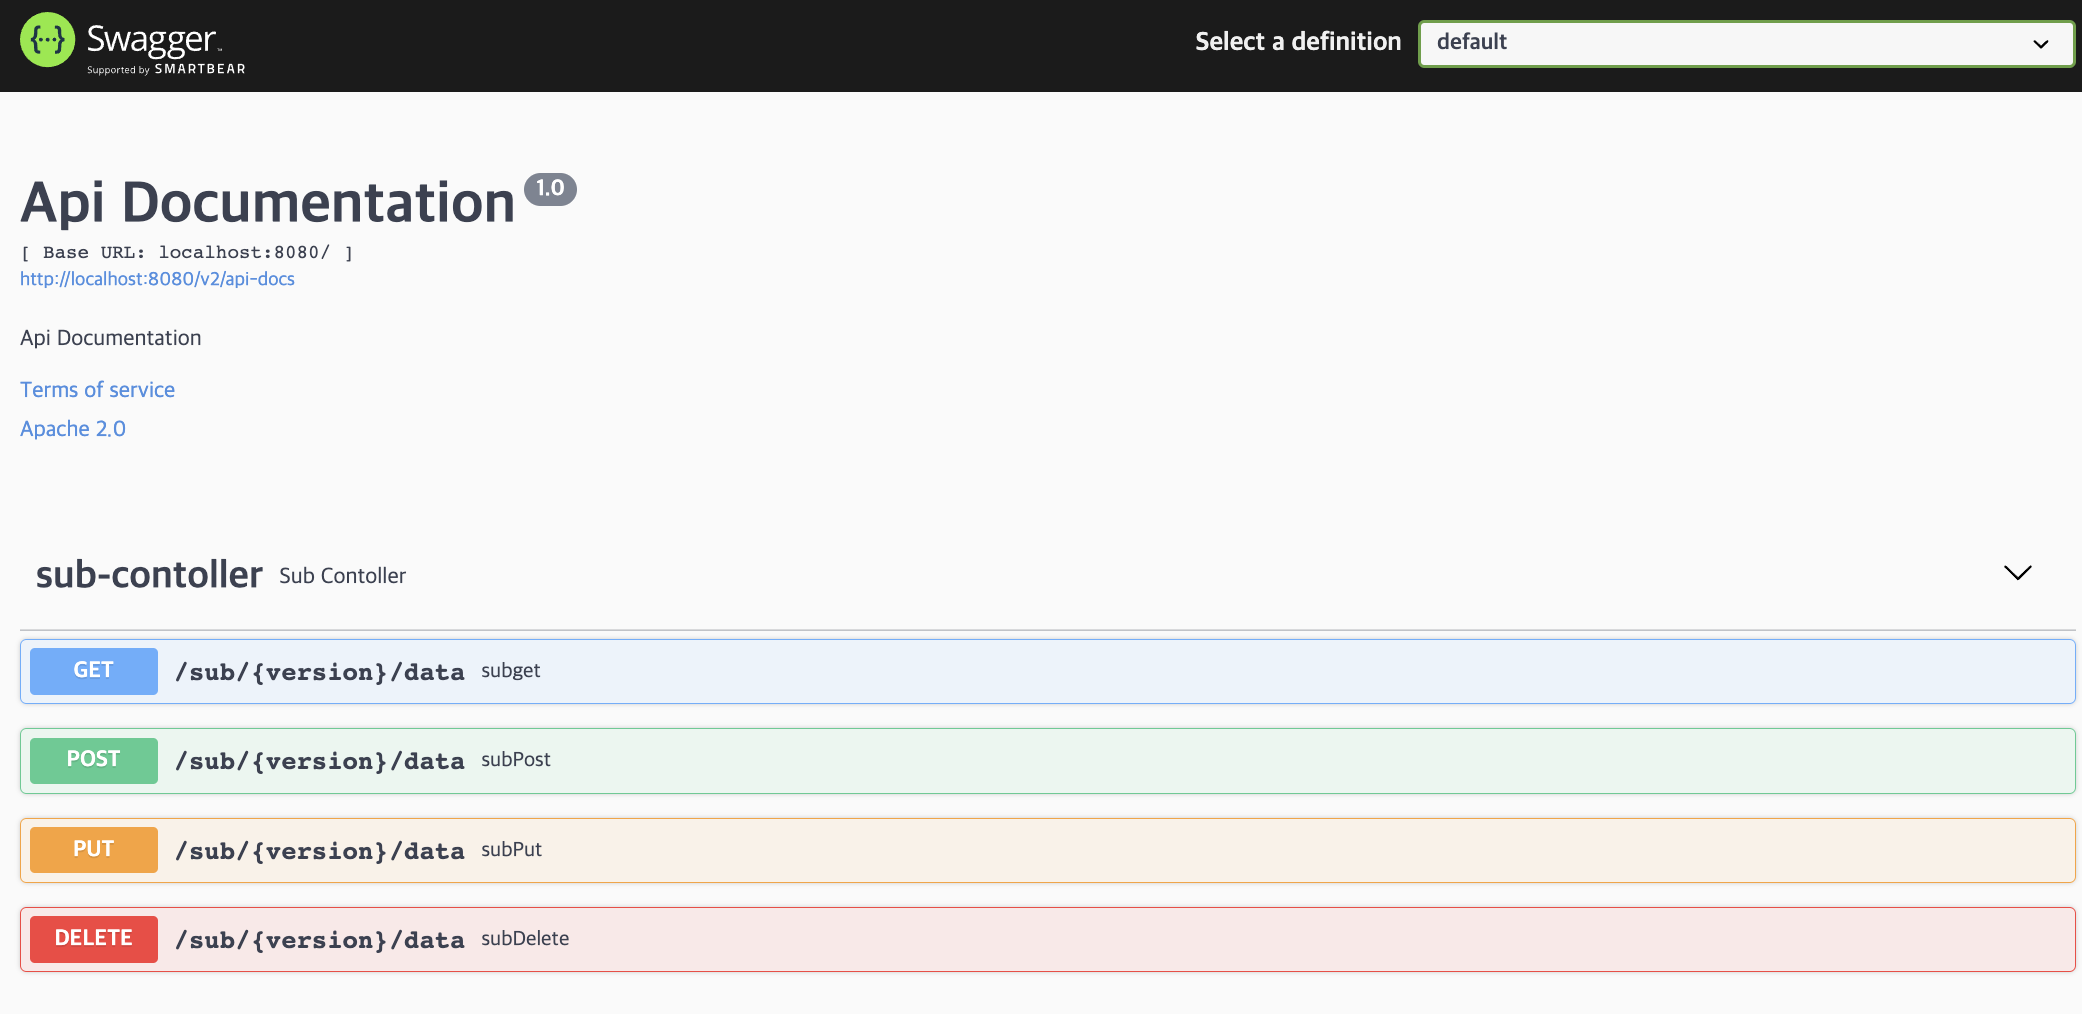
}다시 서버를 재기동하여 확인하면 정상적으로 sub로 시작하는 path 만 규격화 되었다.
path 형식을 통해 수정해도 되나 운영 하다 보면 path 로 처리 하기 어려운 부분도 있을 것이다. 그럴때는 aunotation 으로도 쉽게 숨김 처리가 가능하다.
@ApiIgnore
    @RequestMapping(value = "/{version}/data", method = RequestMethod.POST)
    public Response mainPost(HttpServletRequest request, @PathVariable("version") String version){
        return new Response(){{
            setVersion(version);
            setMethod(request.getMethod());
        }};
    }
확인해보면 POST 방식이 숨김 처리 되었다.

다음으로 규격서에 표기되는 정보를 수정하고 싶다면 아래와 같이 설정한다.
@EnableSwagger2
@Configuration
public class Swagger {
    @Bean
    public Docket api() {
        return new Docket(DocumentationType.SWAGGER_2)
                .select()
                .apis(RequestHandlerSelectors.any())
                .paths(PathSelectors.ant("/sub/**"))
                .build()
                .apiInfo(apiInfo());
    }

    private ApiInfo apiInfo() {
        return new ApiInfo(
                "CORIN REST API",
                "corin api document",
                "API V1",
                "https://co-de.tistory.com/",
                new Contact("corin", "https://co-de.tistory.com/", "corin@corin.com"),
                "ⓒCorin CORP ALL RIGHTS RESERVED.", "license URL", Collections.emptyList());
    }
}
재기동 하면 정상적으로 안내 문구가 변경 되었다.

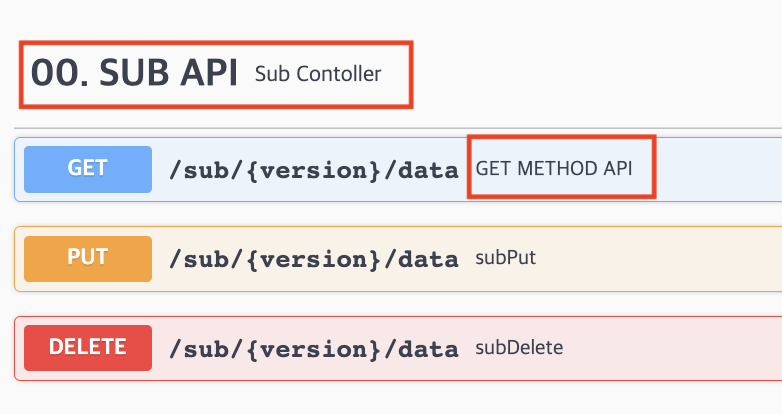
여기서 API 별로 상세 규격 설명을 주고 싶다면 annotaion 을 통해 쉽게 설정 가능하다.
GET API 만 수정 해보고 확인 하도록 한다.
@Api(tags = {"00. SUB API"})
@RequestMapping("/sub")
@RestController
public class SubContoller {

    @ApiOperation(value = "GET METHOD API", notes = "서브 데이터를 가져올때 호출하는 API 입니다.")
    @ApiResponses(value = {
            @ApiResponse(code= 500, message = "server error")
    })
    @RequestMapping(value = "/{version}/data", method = RequestMethod.GET)
    public Response subget(HttpServletRequest request, @ApiParam(value = "version (ex: v1, v2 ..)", required = true) @PathVariable String version){
        return new Response(){{
            setVersion(version);
            setMethod(request.getMethod());
        }};
    }
아래와 같이 각각 설명이 수정 되었다.
상세 정보도 보면 설정 한대로 표기 되는것을 확인할 수 있다.

끝!
:: https://github.com/works-code/swagger
GitHub - works-code/swagger: swagger 연동을 위한 스타터 코드
swagger 연동을 위한 스타터 코드. Contribute to works-code/swagger development by creating an account on GitHub.
github.com
'JAVA' 카테고리의 다른 글
| 내 웹페이지에 LDAP을 연동 해보자! (0) | 2022.05.01 |
|---|---|
| 서버 모니터링 툴(visualVM) 을 붙여보자! (0) | 2022.02.19 |
| 5분 안에 구축하는 Nexus (2) | 2022.02.03 |
| 5분 안에 구축하는 hystrix - Turbine (0) | 2022.01.30 |
| 5분 안에 구축하는 hystrix - Dashboard 연동 (0) | 2022.01.30 |


