
| 일 | 월 | 화 | 수 | 목 | 금 | 토 |
|---|---|---|---|---|---|---|
| 1 | 2 | 3 | 4 | |||
| 5 | 6 | 7 | 8 | 9 | 10 | 11 |
| 12 | 13 | 14 | 15 | 16 | 17 | 18 |
| 19 | 20 | 21 | 22 | 23 | 24 | 25 |
| 26 | 27 | 28 | 29 | 30 | 31 |
- Mac
- ec2
- 젠킨스
- 머신러닝
- login
- aws
- Kafka
- 클러스터
- 간단
- Zeppelin
- SpringBoot
- vue
- hive
- fastcampus
- Redis
- Docker
- 예제
- 자동
- config
- java
- spring
- 설정
- 로그인
- 레디스
- 자바
- Jenkins
- gradle
- EMR
- Cluster
- redash
- Today
- Total
코알못
[Docker] 볼륨 본문
도커 레이어 아키텍쳐는 아래와 같이 두가지 레이어로 되어있다.
- image layer : 이미지 레이어로 읽기전용, 컨테이너는 이미지를 읽어서 만들어짐
- container layer : 읽기, 쓰기 모두 가능한 레이어로 컨테이너 삭제시 사라지는 레이어
여기서 컨테이너 레이어의 경우 컨테이너 삭제시 사라진다고 정의되어있으며 그렇게 되면 안에 있던 볼륨도 제거 될것이다.
정말로 그런지 실습을 통해 확인해보자!
$ docker run -d -it ubuntu:focal bash
$ docker exec -it 777 bash
root@77776327a426:/# echo hello > hello.txt
root@77776327a426:/# ll
total 60
drwxr-xr-x   1 root root 4096 Mar 26 07:17 ./
drwxr-xr-x   1 root root 4096 Mar 26 07:17 ../
-rwxr-xr-x   1 root root    0 Mar 26 07:16 .dockerenv*
lrwxrwxrwx   1 root root    7 Mar 16 17:07 bin -> usr/bin/
drwxr-xr-x   2 root root 4096 Apr 15  2020 boot/
drwxr-xr-x   5 root root  360 Mar 26 07:16 dev/
drwxr-xr-x   1 root root 4096 Mar 26 07:16 etc/
-rw-r--r--   1 root root    6 Mar 26 07:17 hello.txt
drwxr-xr-x   2 root root 4096 Apr 15  2020 home/
lrwxrwxrwx   1 root root    7 Mar 16 17:07 lib -> usr/lib/
lrwxrwxrwx   1 root root    9 Mar 16 17:07 lib32 -> usr/lib32/
lrwxrwxrwx   1 root root    9 Mar 16 17:07 lib64 -> usr/lib64/
lrwxrwxrwx   1 root root   10 Mar 16 17:07 libx32 -> usr/libx32/
drwxr-xr-x   2 root root 4096 Mar 16 17:07 media/
drwxr-xr-x   2 root root 4096 Mar 16 17:07 mnt/
drwxr-xr-x   2 root root 4096 Mar 16 17:07 opt/
dr-xr-xr-x 218 root root    0 Mar 26 07:16 proc/
drwx------   2 root root 4096 Mar 16 17:09 root/
drwxr-xr-x   5 root root 4096 Mar 16 17:10 run/
lrwxrwxrwx   1 root root    8 Mar 16 17:07 sbin -> usr/sbin/
drwxr-xr-x   2 root root 4096 Mar 16 17:07 srv/
dr-xr-xr-x  13 root root    0 Mar 26 07:16 sys/
drwxrwxrwt   2 root root 4096 Mar 16 17:10 tmp/
drwxr-xr-x  13 root root 4096 Mar 16 17:07 usr/
drwxr-xr-x  11 root root 4096 Mar 16 17:09 var/
컨테이너 삭제
$ docker rm -f 777생성하면 읽기전용 이미지 파일 기반으로 만들어 지므로 이전에 생성한 파일이 없다.
$ docker run -d -it ubuntu:focal bash
$ docker exec -it 777 bash
root@77776327a426:/# ll
total 60
drwxr-xr-x   1 root root 4096 Mar 26 07:17 ./
drwxr-xr-x   1 root root 4096 Mar 26 07:17 ../
-rwxr-xr-x   1 root root    0 Mar 26 07:16 .dockerenv*
lrwxrwxrwx   1 root root    7 Mar 16 17:07 bin -> usr/bin/
drwxr-xr-x   2 root root 4096 Apr 15  2020 boot/
drwxr-xr-x   5 root root  360 Mar 26 07:16 dev/
drwxr-xr-x   1 root root 4096 Mar 26 07:16 etc/
drwxr-xr-x   2 root root 4096 Apr 15  2020 home/
lrwxrwxrwx   1 root root    7 Mar 16 17:07 lib -> usr/lib/
lrwxrwxrwx   1 root root    9 Mar 16 17:07 lib32 -> usr/lib32/
lrwxrwxrwx   1 root root    9 Mar 16 17:07 lib64 -> usr/lib64/
lrwxrwxrwx   1 root root   10 Mar 16 17:07 libx32 -> usr/libx32/
drwxr-xr-x   2 root root 4096 Mar 16 17:07 media/
drwxr-xr-x   2 root root 4096 Mar 16 17:07 mnt/
drwxr-xr-x   2 root root 4096 Mar 16 17:07 opt/
dr-xr-xr-x 218 root root    0 Mar 26 07:16 proc/
drwx------   2 root root 4096 Mar 16 17:09 root/
drwxr-xr-x   5 root root 4096 Mar 16 17:10 run/
lrwxrwxrwx   1 root root    8 Mar 16 17:07 sbin -> usr/sbin/
drwxr-xr-x   2 root root 4096 Mar 16 17:07 srv/
dr-xr-xr-x  13 root root    0 Mar 26 07:16 sys/
drwxrwxrwt   2 root root 4096 Mar 16 17:10 tmp/
drwxr-xr-x  13 root root 4096 Mar 16 17:07 usr/
drwxr-xr-x  11 root root 4096 Mar 16 17:09 var/
이렇게 컨테이너 안에 볼륨은 영구적이지 않아 유지 되어야하는 경우에는 곤란한 상황이 발생한다.
여기서 우리는 컨테이너 볼륨을 영구적으로 사용하기 위한 방법 3가지를 배워볼 것이다.
호스트 볼륨, 볼륨 컨테이너, 도커 볼륨을 이용하는 세가지 영구 볼륨 사용 방안이 있으며 호스트 볼륨 부터 알아본다.
1. 호스트 볼륨
호스트 디렉토리를 컨테이너 경로에 마운트하는 방식
로컬에 마운트할 디렉토리 생성후 nginx html 파일 생성
$ mkdir html
$ echo '<h1>hello corin<h1>' > index.html
도커 생성
$ docker run -d -v $(pwd)/html:/usr/share/nginx/html -p 80:80 nginx확인 및 테스트
$ docker ps
CONTAINER ID   IMAGE     COMMAND                  CREATED         STATUS         PORTS                NAMES
d21a075d136b   nginx     "/docker-entrypoint.…"   3 seconds ago   Up 2 seconds   0.0.0.0:80->80/tcp   goofy_maxwell
$ curl localhost
<h1>hello corin<h1>
2. 볼륨 컨테이너
호스트 볼륨을 바라보는 컨테이너를 생성(=볼륨 컨테이너)하여 다른 컨테이너에서 볼륨 컨테이너를 바라보도록 하는 방식
볼륨 컨테이너 생성
$ docker run -d -it -v $(pwd)/html:/usr/share/nginx/html --name nginx-volume ubuntu:focal
fc66ab8d24b1b7df236f4fd519a753dcfeca34a6b1f64601f18521d1a0dbfe1e
볼륨 컨테이너를 바라보는 nginx 컨테이너 두개 생성
$ docker run -d --name corin-nginx --volumes-from nginx-volume -p 80:80 nginx
6612014e1c621a639271f0f73bd6510698406848e5ef7708a9951bc8704b7f07
$ docker run -d --name corin-nginx2 --volumes-from nginx-volume -p 8080:80 nginx
bc9971f67e5020ca3ec0769852905cb3cd0cd85e625f0bc8e230590946a0522c
확인 및 테스트
$ docker ps
CONTAINER ID   IMAGE          COMMAND                  CREATED              STATUS              PORTS                  NAMES
bc9971f67e50   nginx          "/docker-entrypoint.…"   2 seconds ago        Up 2 seconds        0.0.0.0:8080->80/tcp   corin-nginx2
6612014e1c62   nginx          "/docker-entrypoint.…"   17 seconds ago       Up 16 seconds       0.0.0.0:80->80/tcp     corin-nginx
fc66ab8d24b1   ubuntu:focal   "bash"                   About a minute ago   Up About a minute                          nginx-volume
$ curl localhost
<h1>hello corin<h1>
$ curl localhost:8080
<h1>hello corin<h1>
inspect 를 통해 마운트 된 볼륨 정보도 확인 가능하다.
$ docker inspect [container]
        "Mounts": [
            {
                "Type": "bind",
                "Source": "/host_mnt/Users/hongyoolee/html",
                "Destination": "/usr/share/nginx/html",
3. 도커 볼륨
도커에서 제공하는 볼륨서비스로 'docker volume create' 명령어로 볼륨 생성시 '${docker home}/volumes/${volume name}/_data/ ' 경로에 볼륨이 생성된다.
우선 볼륨을 생성한다.
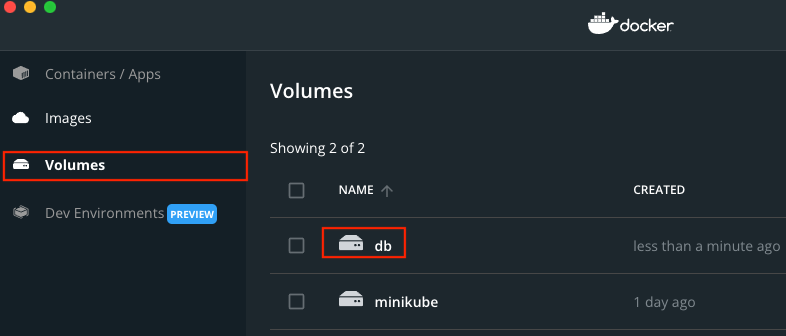
$ docker volume create db볼륨이 정상적으로 생성 됐는지 확인 한다.
$ docker volume ls
DRIVER    VOLUME NAME
local     db
local     minikube
그 다음 해당 볼륨의 상세정보를 확인한다.
$ docker volume inspect db
[
    {
        "CreatedAt": "2022-03-26T07:54:22Z",
        "Driver": "local",
        "Labels": {},
        "Mountpoint": "/var/lib/docker/volumes/db/_data",
        "Name": "db",
        "Options": {},
        "Scope": "local"
    }
]
리눅스의 경우 위에 기재된 경로로 가면 볼륨 데이터 확인 가능하나 mac 의 경우 'no such file or directory' 라는 디렉토리 또는 파일이 없다는 에러가 발생한다. (해결 방안은 최 하단에 참고사항 참고)
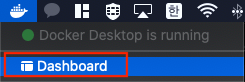
그래서 우선 docker dashborad 를 이용하여 확인한다.
우선 아무것도 없다.
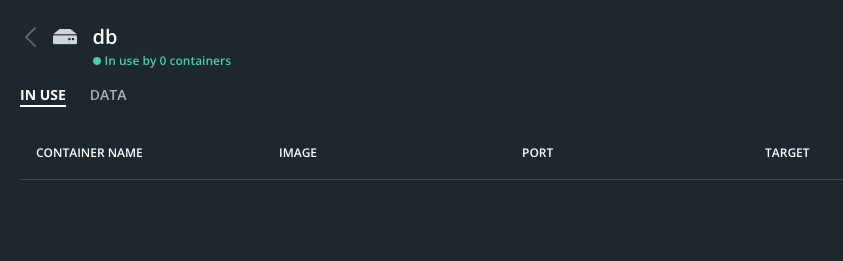
그럼 해당 볼륨에 연결하여 컨테이너를 생성한다.
docker run -d \
--name corin-mysql \
-e MYSQL_DATABASE=corin \
-e MYSQL_ROOT_PASSWORD=corin \
-v db:/var/lib/mysql \
-p 3306:3306 \
mysql:5.7
연결 하니 아래와 같이 볼륨에 연결된 컨테이너 볼륨정보가 나온다.
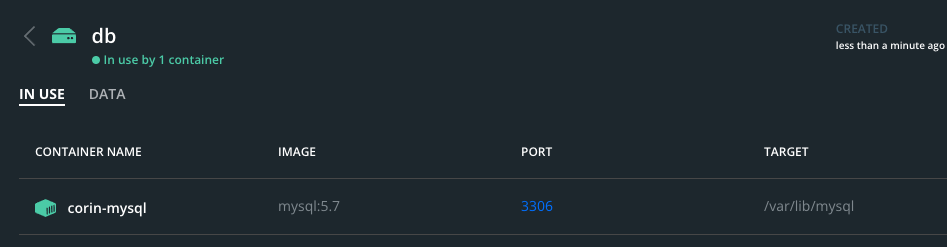
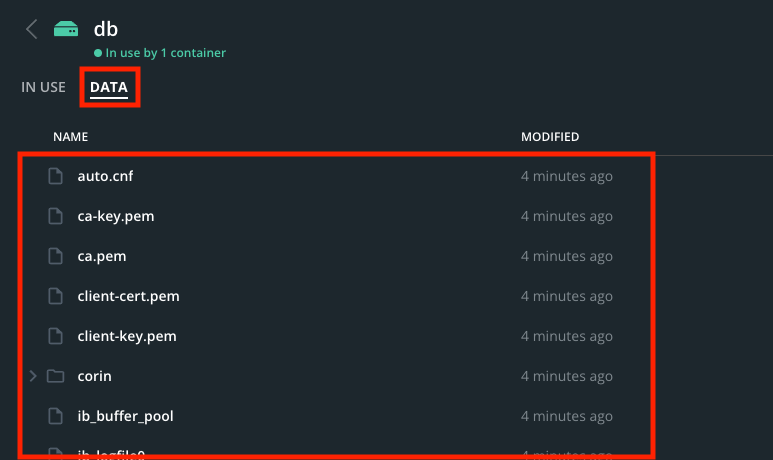
데이터를 눌러 데이터 확인한다.
이제 mysql 컨테이너에 접속 하여 환경 설정에 입력한 정보기반으로 생성한 database 에 접속하여 테이블을 생성한다.
컨테이너 접속
$ docker exec -it corin-mysql bashmysql 접속 및 테이블 생성, 데이터 삽입
$ mysql -u root -p
Enter password:
Welcome to the MySQL monitor.  Commands end with ; or \g.
Your MySQL connection id is 4
Server version: 5.7.37 MySQL Community Server (GPL)

Copyright (c) 2000, 2022, Oracle and/or its affiliates.

Oracle is a registered trademark of Oracle Corporation and/or its
affiliates. Other names may be trademarks of their respective
owners.

Type 'help;' or '\h' for help. Type '\c' to clear the current input statement.

mysql> show databases;
+--------------------+
| Database           |
+--------------------+
| information_schema |
| corin              |
| mysql              |
| performance_schema |
| sys                |
+--------------------+
5 rows in set (0.00 sec)

mysql> use corin;
Database changed
mysql> show tables;
Empty set (0.00 sec)

mysql> create table tb_test( id int);
Query OK, 0 rows affected (0.02 sec)

mysql> insert into tb_test values (1);
Query OK, 1 row affected (0.01 sec)

mysql> select * from tb_test;
+------+
| id   |
+------+
|    1 |
+------+
1 row in set (0.00 sec)
이제 해당 컨테이너를 삭제한다.
$ docker ps
CONTAINER ID   IMAGE       COMMAND                  CREATED         STATUS         PORTS                               NAMES
a3986c1984ff   mysql:5.7   "docker-entrypoint.s…"   7 minutes ago   Up 7 minutes   0.0.0.0:3306->3306/tcp, 33060/tcp   corin-mysql
$ docker rm -f a3
a3
$ docker ps
CONTAINER ID   IMAGE     COMMAND   CREATED   STATUS    PORTS     NAMES
이제 컨테이너를 볼륨 붙여 다시 생성하여 기존에 만든 데이터가 유지 되어있는지 확인 한다.
생성된 mysql 을 이용하는 것이니 초반 설정을 위한 환경 변수는 입력하지 않아야한다.
$ docker run -d -v db:/var/lib/mysql --name corin-mysql -p 3306:3306 mysql:5.7해당 컨테이너에 접속하여 mysql 에 접근한다.
$ docker exec -it c7 bash
root@c73c31a31a11:/# mysql -u root -p
Enter password:
Welcome to the MySQL monitor.  Commands end with ; or \g.
Your MySQL connection id is 2
Server version: 5.7.37 MySQL Community Server (GPL)

Copyright (c) 2000, 2022, Oracle and/or its affiliates.

Oracle is a registered trademark of Oracle Corporation and/or its
affiliates. Other names may be trademarks of their respective
owners.

Type 'help;' or '\h' for help. Type '\c' to clear the current input statement.

mysql>
기존에 만들어둔 데이터가 있는지 확인하면 정상적으로 조회 된다.
mysql> show databases;
+--------------------+
| Database           |
+--------------------+
| information_schema |
| corin              |
| mysql              |
| performance_schema |
| sys                |
+--------------------+
5 rows in set (0.00 sec)

mysql> use corin;
Reading table information for completion of table and column names
You can turn off this feature to get a quicker startup with -A

Database changed
mysql> show tables;
+-----------------+
| Tables_in_corin |
+-----------------+
| tb_test         |
+-----------------+
1 row in set (0.00 sec)

mysql> select * from tb_test;
+------+
| id   |
+------+
|    1 |
+------+
1 row in set (0.00 sec)
볼륨 제거는 아래와 같이 하며, 만약 제거가 안되면 해당 볼륨을 사용하는 컨테이너를 제거후 삭제 가능하다.
$ docker volume rm db
db
만약 호스트의 볼륨이 수정하면 안되는 읽기 전용 볼륨으로 사용하고 싶다라고 하면
'ro' 라는 (read only 의미) 단어를 추가해 읽기 전용 볼륨으로 생성 가능하다.
아래와 같이 -v 옵션의 마지막에 :ro 를 붙이면 완료이다!
$ docker run -d -it -v $(pwd)/html:/usr/share/nginx/html:ro --name nginx-volume-ro ubuntu:focal이제 nginx 를 해당 볼륨에 붙인다.
$ docker run -d --volumes-from nginx-volume-ro -p 80:80 --name nginx-ro nginx
90c517a807c188bad37c2106978f42a6b379d6f4df17799488f5ad502ddf0684
$ docker ps
CONTAINER ID   IMAGE          COMMAND                  CREATED         STATUS         PORTS                NAMES
90c517a807c1   nginx          "/docker-entrypoint.…"   3 seconds ago   Up 2 seconds   0.0.0.0:80->80/tcp   nginx-ro
5a545a8e25a7   ubuntu:focal   "bash"                   7 seconds ago   Up 6 seconds                        nginx-volume-ro
그리고 bash 로 접속해서 마운틴된 볼륨에 파일을 생성하려고 하면 read only 라는 문구와 함께 쓰기가 불가능하다.
$ docker exec nginx-ro bash
$ docker exec -it nginx-ro bash
root@90c517a807c1:/# cd /usr/share/nginx/html/
root@90c517a807c1:/usr/share/nginx/html# ls
index.html
root@90c517a807c1:/usr/share/nginx/html# cat index.html
<h1>hello corin<h1>
root@90c517a807c1:/usr/share/nginx/html# echo test > test.txt
bash: test.txt: Read-only file system
끝!
<참고사항>
macos의 경우 그 위에 docker container 가 바로 뜨는 것이 아닌 hyperkit(virtualized environment), linuxkit(lightweight linux) 위에서 실행 시키기에 macos의 해당 경로에서 원하는 파일을 찾을수 없던 것이다.
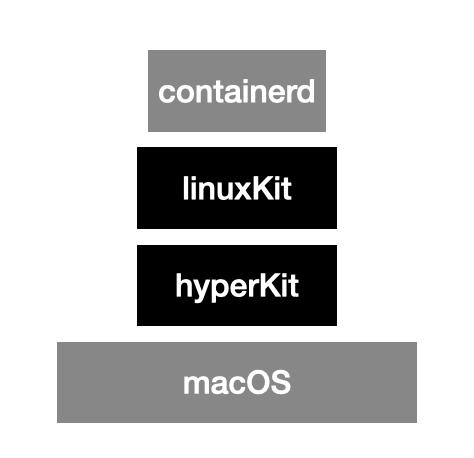
그럼 linuxKit 의 해당 경로로 가야 원하는 파일을 찾을수 있다는 뜻으로 아래 컨테이너를 통해 linuxKit 를 접속해보자
$ docker run -it --rm --privileged --pid=host justincormack/nsenter1
/ #
이제 위에서 찾지 못한 '/var/lib/docker/volumes/db/_data' 경로로 가본다.
/ # cd /var/lib/docker/volumes/db/_data
/var/lib/docker/volumes/db/_data # ls
auto.cnf            client-cert.pem     ib_buffer_pool      ibdata1             performance_schema  server-cert.pem
ca-key.pem          client-key.pem      ib_logfile0         ibtmp1              private_key.pem     server-key.pem
ca.pem              corin               ib_logfile1         mysql               public_key.pem      sys
정상적으로 조회되는 것을 확인 할 수 있다.
'ETC' 카테고리의 다른 글
| 5분 안에 구축하는 LDAP (0) | 2022.04.23 |
|---|---|
| [Docker] 로그 (0) | 2022.03.26 |
| [Docker] 네트워크 (0) | 2022.03.26 |
| [Docker] 설정 방법 및 실행중인 컨테이너 접속 (0) | 2022.03.25 |
| [Docker] 구성 및 기본 명령어 (0) | 2022.03.25 |


